Clamping at ANY Angle
- Step 1: Grab a Scrap Piece of Wood and a Piece of Paper. You'll need-
- Step 2: Create a 45 Degree Angle.
- Step 3: Mark a 90 Degree V.
- Step 4: Mark the Edge.
- Step 5: Optional: Drill at the Intersection.
- Step 6: Cut Out the V and Cut Off the V Block.
- Step 7: Clamp at 45 Degrees!
- 34 Discussions.
.
Similarly, do I need to clamp wood glue?
Wood glue as you know is very strong but it can take a long time to set up. We often need to use clamps to hold the pieces together while the glue dries. Instead of using brad nails, use a few dabs of super glue and wood glue instead.
Likewise, what can I use instead of a clamp? Clamping without Clamps
- Weights. Let gravity do the work!
- Cams. Cams are a circle with a pivot point that is slightly off center.
- Elastic Ropes. Anything rope-like with elasticity works great for clamping: surgical tube, bungee cords, rubber bands, and yes, even those elastic workout bands.
- Go-Bar-Deck.
- Wedges.
- Tape.
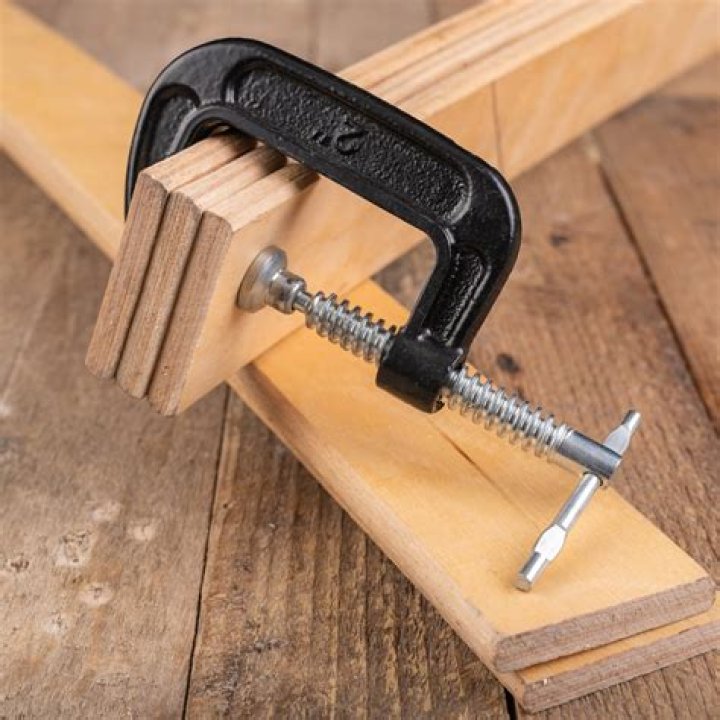
Moreover, how do you use a wood clamp?
How to Use Wood Clamps
- Step 1: Check for Clean. Before you begin, make sure your clamp is clean.
- Step 2: Glue Wood. Attach your wood pieces with a thin layer of wood glue.
- Step 3: Attach Clamp.
- Step 4: Squeeze Shut.
- Step 1: Open Clamp.
- Step 2: Position and Glue Wood.
- Step 3: Secure Clamp.
- Step 1: Glue Wood.
What angle do you cut wood to make a square?
Miter Gauges, Miter Saws and Miter Cuts The term "square cut" means to cut a board at a 90 degree angle relative to one of it's edges.
Related Question AnswersHow do I strengthen my Mitre joints?
Strengthening a Miter joint All you need to make a spline is a jig to hold the box and/or lid at a 45 degree angle. I cut the kerfs for the splines on my table saw using the jig to the left, but it can also be done using a router with a similar jig. Once you've cut the slots you simply glue in a matching spline.How do you repair curved wood?
To straighten warped wood, I soak in water. Or if you can't submerse them put a wet cloth on the inside of the warp curve, and soak until straight. Once straight, switch the water formula for an Elmer's white glue or the wood glue with water.How do you clamp an angle?
Clamping at ANY Angle- Step 1: Grab a Scrap Piece of Wood and a Piece of Paper. You'll need-
- Step 2: Create a 45 Degree Angle. Fold the piece of paper to form a 45 degree angle.
- Step 3: Mark a 90 Degree V.
- Step 4: Mark the Edge.
- Step 5: Optional: Drill at the Intersection.
- Step 6: Cut Out the V and Cut Off the V Block.
- Step 7: Clamp at 45 Degrees!
What are the different types of clamps?
What are the different types of clamps?- Screw Clamps. Screw clamps are types which use a screw mechanism to adjust the jaws and clamp a workpiece in place.
- Quick-Release Clamps.
- Bar Clamps.
- Locking Clamps.
- Angle Clamps.
- Flooring Clamps.
- Band Clamps.
- Toggle Clamps.
What is a right angle corner?
Informally, a right angle is the angle at the corner of a (rectangular) piece of paper. The measure of a right angle, in degrees, is 90°.How do you cut a 60 degree angle with a miter saw?
How to Cut a 60-Degree Angle on a Miter Saw- Place the miter saw on a stable work bench, free of debris and loose objects.
- Place the wood stock on the miter table, flush up against the rear fence.
- Pull the blade up.
- Unclasp the wood stock and position it on the table so your workpiece will abut against it.
What is the best corner clamp?
The 8 Best Corner Clamps- Kreg KHCCC 90° Corner Clamp – Best Overall.
- Wolfcraft 90-Degree Corner Clamp.
- HORUSDY 90° Corner Clamps – Best Value.
- Can-Do Clamp – Best for Picture Frames.
- Milescraft 4005 90° Corner Clamp.
- Housolution Right Angle Clamp.
- ODELENWA Right Angle Clamp.
- Pro-Grade 59162 Corner Clamps.